Frequently Asked Questions
We are dedicated to optimize the user experience, functionality and beauty of our products. Here at Brookharbor Software you will
enjoy technology products created out of long experience and dedication of an excited team. Enjoy our apps, and please do not forget to support future development of the apps by purchasing the offered In-App Purchases®. We greatly appreciate your support! The Brookharbor Software Team |
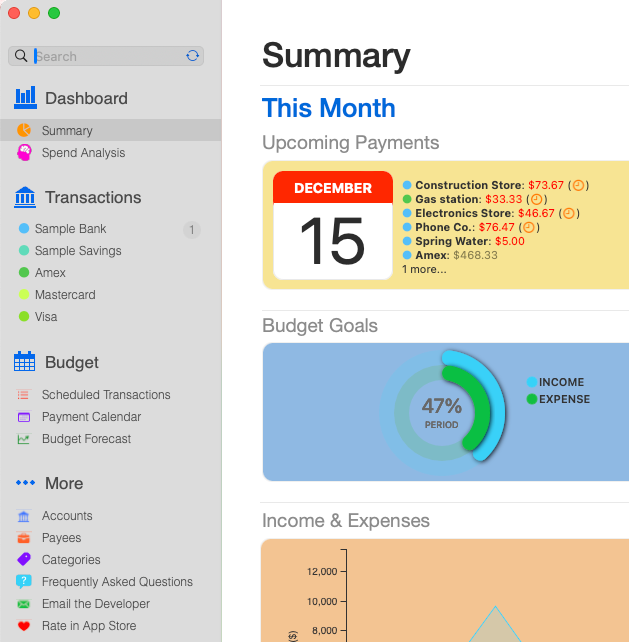
What Are the Main Sections of the Apps?
There are four groups of functionalities used to manage related information:
- The Dashboard section shows a set of widgets presenting aggregated values for all of your transactions from all accounts, in different periods of time. Also, the new spend analysis report shows trend on your expenses based on categories and payees, comparing data from current and previous periods; - The Transactions section is used to manage transactions in each of your accounts; - The Budget section is used to manage recurring transactions you want to add. For instance, every month you pay Utilities / Gas; - The More section is used to manage the lists you use in your transactions TIPS: - Use the search box to filter the list currently selected (transactions, schedule, calendar, account or payee). You can filter by names, values, etc. - Use the refresh button inside the search box to update the content of the currently selected option |
How To Manage Accounts?
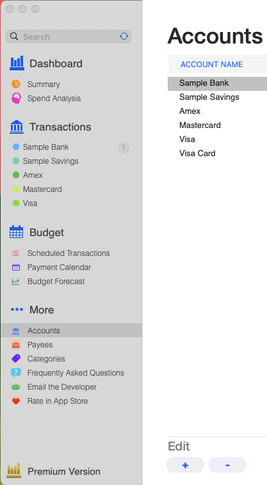
You can manage accounts of three types: Checking, Savings or Credit.
- To manage accounts use the buttons under the 'Edit' section of the content area panel. The "See Details" link at the right portion is used to edit the currently selected account in the grid. Important: Please note that when you delete an account all of its transactions will also be deleted. Cool features: - You also have the ability to inactivate an account, by unchecking account field Active. This will hide your account from the Transactions menu; - By default the accounts are presented sorted by type (checking, savings, then credit), and then account name. However, you can override this and define your own sort order: simply type sequence numbers in the field Menu Order. |
How To Manage Transactions?
|
|
You can either enter transactions manually, or import from a file you have downloaded from your financial institution:
- To enter transactions manually use the buttons at the bottom of grid in the Transactions section;
- To import transactions from a downloaded file use the "Import" button at the top of the screen. The App accepts the most used file formats for financial statements: ..ofx, .qfx and .csv.
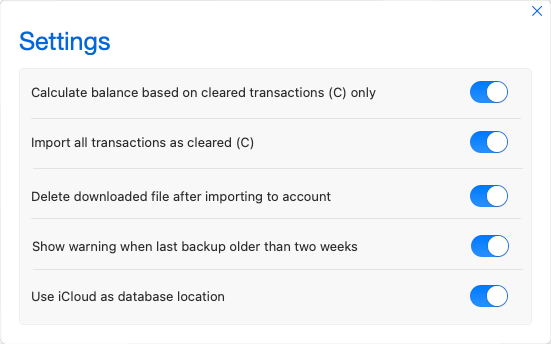
- To import transactions as already cleared, go to Settings option under TRACKEN menu and check the item for "Import all transactions as cleared (C)"
Important: When importing (.csv) files, please select at least columns for Date and Amount. Invalid contents will be ignored and records will not be imported!
Selected account:
When you import a file to a selected account for the first time, the app will inform you that the account number is different than the one in the statement. Once you confirm, next time it will verify to ensure that you are importing to the correct selected account.
Account balances calculation:
By default transactions are used to calculate the account balances only after you check the 'C' (cleared) column. Transactions not checked will not be used for calculating the account balances. You can modify this behavior going to Settings option under TRACKEN menu and unchecking item for "Calculate balance based on cleared transactions (C) only".
Cool features:
- Click the column labels to sort transactions based on that column: first click sorts in ascending order, second click sets in descending order, and their click sets back to the column default order;
- As you identify the payees and categories from an imported transaction, the next time the app will remember that selection and do it for you automatically;
- When you mark a transaction as a transfer the app will generate the equivalent transaction in the transfer account. Any modification will be reflected in both accounts.
How To Schedule Recurring Transactions?
|
|
You can add recurring scheduled transactions for payment, deposit and transfer. The scheduled transactions will be used for presenting your budget forecast. The forecast uses today's balance on each of your accounts and apply all future scheduled transactions to show what you should expect in the future --based on what you have planned.
Cool features:
- You can modify the date or value for some of the future instances of your scheduled transactions;
- As you enter a transaction the app will check if you have an equivalent scheduled transaction for that same Payee, and properly update the schedule. If you prefer you can manually move a scheduled transaction to the account, by using the "Move" button in the detail for the scheduled transaction.
How To Use the Summary Charts?
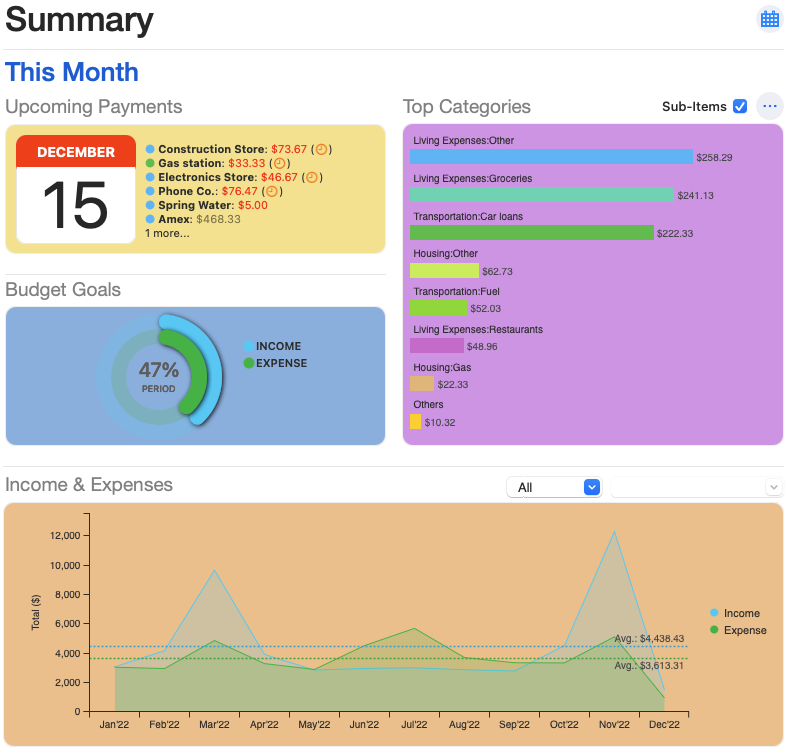
Use the dashboards to see several widgets showing aggregated values for the selected period: today's payments (including pending ones), total values of transactions entered for same Payee and Category, budget goals, etc.
Click on an arc, bar, or area and drill-down to the actual transactions used to calculate that aggregated value. |
Cool features:
- Scheduled transactions are automatically marked as budgeted (see column 'Budg.'), and will be summarized either under income or expense budgets. Budget values are presented as the actual versus budgeted;
- On all charts you can click on a section and drill-down to the list of transactions that were used for calculation of that summarized value;
- Once you are seeing the related transactions you can click the "Detail" button and modify that transaction --including if they are supposed to be marked as budgeted (or scheduled). The app will refresh all charts with the updated values.
- In the area chart you can see totals for your income and expense on each month, based on the entered transactions for all accounts. Two flat-lines for income and expense are also presented to indicate the average values for the year.
TIPS:
- In the "Income & Expenses" widget select a specific category (from the dropdown lists) for visualizing its average value in the previous year. This way you can create your budget based on the average values for the previous year;
- You can also use the "Budget Goals" widget to see totals for actual versus budgeted values for the selected period, in a single chart. The expectation is that arcs for income and expense are progressing in the same proportion as the period. The center indicates the percentage of number of days for the selected period.
How To Backup and Restore my Database?
|
|
Our local station apps offer options to backup and restore the database files. If you are using the option to save your data on your local station, ideally you should plan for creating regular backup of your data (let's say, weekly), just in case you need to restore your data from a given point in time.
To create a backup file:
In the File menu, select Create Backup option to create a backup file. The default file name is formed with the current date and ".bkp" extension. The app will ask you to select a location and then will save a copy of your current data.
To restore a backup file:
In the File menu, select Restore Backup option to restore a previously created backup file. The app will ask you to select the location of the backup file (with ".bkp" extension), and then will restore that data to the currently open database file, entirely replacing your current data.
TIPS:
You cannot directly open a database file created by previous versions of BUDGETTAIL in TRACKEN. However, TRACKEN offers the option to restore a backup file created by BUDGETTAIL. This way you can easily transfer your data from BUDGETTAIL to TRACKEN.
How To Archive Transactions?
|
|
TRACKEN offers capability to archive transactions that are older than previous year. Archiving these old transactions will avoid cluttered grids to be presented, as well as improve performance when calculating the summary charts. The archived transactions will be saved in a separate backup file, and readily available for you in case you need in the future.
In the File menu, select Archive option to start archiving older transactions. The app will ask for a location to save the old transactions, and then saving them --in addition to removing from current database file.
In the File menu, select Archive option to start archiving older transactions. The app will ask for a location to save the old transactions, and then saving them --in addition to removing from current database file.
How To Set my Database Location?
|
You can keep your data saved either on your local station or in your iCloud® account. When you save your data locally you can access your database only using the TRACKEN for macOS. However, when you choose to save your data in iCloud you can also access your data from your iPhone® using TRACKEN for iOS®.
To set your database location go to Settings option under TRACKEN menu and enable option to "Use iCloud as database location". |
TIPS:
- If you are currently saving your data locally and want to start using iCloud as database location, you can create a backup of your current data and restore it once using the iCloud:
a) In the File menu select Create Backup option to create a backup of your current local data.
b) Select location where your backup file should be saved
c) Now in the Tracken menu select Settings option
d) Once the Settings dialog open, select the option to "Use iCloud as database location"
e) Close the dialog. You will receive a message informing your data now is going to be saved in the iCloud
f) Now in the File menu select Restore Backup option to restore a backup file
g) Select the backup file you created in "Step b" above
Once you do the steps above, your local data will be transferred to a database in the iCloud, and shared with your iPhone. You can download and use Tracken Mobile to access and update same data!


